Friday, July 7, 2017

In Recognition Of . . .

Who remembers this logo?

The line would extend out the small door onto the sidewalk, winding its way down the street edging towards the next block. The sight was a kind of human rainbow displaying bands of colour and texture; halter tops, cut-offs, flip flops, afros, tie-dye and beads.  Friends and neighbors chatted and fanned themselves while patiently waiting to place their order for what all agreed was the best ice cream, ever.  Early September, the month when temperatures are known to soar in the City by the Bay and a cup or a cone mounded high with Bud’s cooling confection was the only remedy. 
   
 Bud’s Ice Cream was a small hole-in-the-wall around the block from my grandparent’s house in the Noe Valley District. And yes, this neighborhood ice cream shop was actually in Noe Valley, though I’ve seen postings stating it was located in the Castro District.  No matter where you drew your District lines, there were few among us, who weren’t willing to stand in line at the corner of Castro and 24th, for one of Bud’s cones or sundaes.  I was maybe eleven years when I was allowed to walk to the shop by myself and become part of the neighborhood landscape.  On that first day of more to come, I did my best balancing the small order of treats back to the Victorian house on Jersey Street.  Vanilla for Papa, Pistachio for Uncle Orieto, Chocolate-Cherry for Titi and Rocky Road for myself. 

  I’m sure you’re thinking , summers in San Francisco are NOT that warm.  This could be due an experience you shared, similar to that of Mark Twain’s.  Resulting in his famous line; “The coldest winter I ever saw was a summer in San Francisco.”  Which, by the way, is a disputed quote, as there is some record disproving Twain ever said this. Whether Twain actually found himself bundled up and shivering during the months of June and July in the Foggy City, it seems clear to me he never visited in September and certainly didn’t know about Bud’s because he never wrote about it. 

Most residents of Noe Valley, Castro and the Mission knew it was worth the consistently long wait for a crispy cone filled with Bud’s rich, creamy concoction of sweetness churned with an abundance of whole milk and heavy cream.  Back then there was no Ben & Jerry’s, no Fro-Yo and Gluten-Free?  We loved gluten!  We really loved Bud Scheidelman and his cousin, Alvin Edlin, who later owned the creamery and incorporated all kinds of delicious additions into their happy creations.  Chunks of real fruit, chopped up (hometown) Ghirardelli Chocolate, thick ribbons of caramel and marshmallow and nuts galore.


It didn’t take long after another Ice Cream shop opened across the street from Bud’s, Alvin, decided offering the highest in quality ingredients was the only way to beat the competition into soggy, drippy submission.  And it did.  Those who worked at Bud’s say Alvin was always yelling; “Put more cherries in the cherry Ice Cream!  Add more fudge to the fudge Ice Cream!  When my customers order caramel Ice Cream, I want a chunk of caramel candy in every bite!”  Hence Bud’s famous slogan: “The finest ingredients and too much of them.”

Today we have a mecca of Ice Cream options to explore for our indulgent pleasure.  But, making your own Ice Cream from scratch is so blasted easy.   Why not just make some yourself, using the very best ingredients just like Bud’s? 


Bud’s focus was Ice Cream and while I do like Ice Cream I really like Gelato, also quite easy to prepare.  So what are the differences between the cooling confections Ice Cream, Gelato?

First about Ice Cream. Did you know ice cream is one of the top ten food items Americans love best?  It’s right up there with pizza, burgers, fries and hotdogs.  And did you know we Americans declared July as National Ice Cream Month?  Yes, it's nationally recognized.  Gosh American marketers are geniuses.   The biggest difference about Ice Cream is the heavy cream.  And it has more sugar than Gelato.  But hey, if you’re going to have dessert or “cheat,” then do it right!  I’m not one for the mediocrity of low-cal cookies or non-fat shakes and smoothies.  Or worse, non-fat ice-milk!  If you’re going to treat yourself then by all means, do it to the fullest!   Now Gelato has less fat, using only whole milk, no heavy cream and not as much sugar.  It’s also churned slower and for less time.  Resulting in less air being incorporated into the mixture, which makes Gelato denser than Ice Cream. 

  Here are 2 recipes, one for Ice Cream and one for Gelato, both so easy and ultra-delicious. 
You can purchase ice cream machines for well under $100.00

* Note: you need an ice cream machine.  They’re not expensive and are so easy to find. 
My new favourtie flavor


CHEF DEBORAH’S VERSION OF CHOCOLATE-CHERRY ICE CREAM
Ingredients
2 cups heavy whipping cream                     1 cup whole milk
½ cup dark Dutch cocoa powder                ¾ cup granulated sugar (I use super fine, Bakers or Caster)
¼ teaspoon salt                                              6 large egg yolks
1 teaspoon vanilla bean paste                     ¼ cup bitter-sweet chocolate chunks       
  ½ cup maraschino cherries-cut in half

Process
In large mixing bowl whisk egg yolks until they turn light yellow in colour.  Set to the side.

In a large, heavy saucepot, over medium heat, combine heavy cream, milk, cocoa powder, sugar and salt.  Bring just to a simmer then remove from heat.  

Temper the egg yolks, by adding 2-3 ladles of the warm milk mixture to whisked eggs, one ladle at a time.
 
Making sure to whisk in each addition before adding the next ladle. 

Once the egg yolks have been combined with the warm milk additions, pour the entire egg mixture into the saucepot with the remaining cream/milk mixture.  Return pot to the heat and continue stirring until mixture thickens and reaches 175-180 degrees (F).  Do not allow mixture to boil.

Strain the ice cream base by pouring over a strainer or sieve into a clean bowl and whisk in vanilla paste.

 Place bowl over an ice bath or in the fridge to cool completely.  Once cooled pour base into canister of your ice cream machine and turn on to ice cream setting or just “on” depending on what type of machine you have.

During last few minutes of churning slowly add chocolate chunks and cherry halves.  Scoop into bowls or cones.
                                                                                                                           Makes 1 Quart

How can you say "no" this summer delight?


PISTACHIO GELATO
Ingredients
3 cups whole milk                            6 egg yolks                  ¾ cup super fine sugar (Bakers or Caster)
1 teaspoon vanilla bean paste                                            Pistachio paste * Recipe below
Shelled pistachios for garnish

Pistachio Paste
Ingredients
1 cup shelled unsalted pistachios               2 Tblsp sugar           1 tsp olive oil

Process
Begin by blanching shelled nuts in a pot of simmering water for about 2 minutes.  Immediately remove nuts using a slotted spoon or spider and plunge into a bowl of ice water to stop cooking process.  Remove nuts and spread on a paper towel in a single layer to dry.

Once nuts have completely dried, place in a food processor (don’t use a blender, you won’t be able to get all the paste out) with sugar and olive oil.  Blend together until a nice, but rather dry, paste has formed.  Scoop out into a clean, small bowl until ready to use.
Gelato

Process
In medium bowl, whisk egg yolks until they turn light yellow in colour.  Set aside.
In a heavy saucepot, over medium heat, combine milk and sugar.  Bring just to a simmer, then remove from heat. 

Add one ladle of warm milk mixture to bowl of egg yolks and whisk.  Do this two more times to temper your eggs.  Then pour entire egg/milk mixture back into saucepot and replace on heat.  Continue stirring (not whisking) with a wooden spoon until mixture thickens and reaches 175-180 degrees (F).  Do not allow mixture to boil. 

Remove from heat and pour over a strainer or sieve into a clean bowl.  Stir in vanilla bean paste and prepared pistachio paste until well combined. Set bowl on an ice bath or in the fridge until completely cooled.

Once cooled, pour gelato base into your ice cream machine and run to “soft serve” setting or according to manufacturer’s directions for gelato. 
                                                                                                                          Makes  1 Quart

It’s only a childhood memory now, but Bud’s Ice Cream was a jumping place back in the ‘70’s.  No longer part of the old neighborhood, you’ll find a deli at 24th and Castro.  Though I read somewhere you can still purchase Bud’s Eggnog on line. 
 That was another luxurious and decadent ice cream flavor back in the day, available year round.

 Now, if Marty Mcfly unexpectedly showed up and asked me where I wanted to go in that DeLorean , without hesitation, I’d tell him the corner of Castro and 24th, 1977.  “My treat.” 
I scream, you scream we all scream for . . .

Friday, June 2, 2017

IL NOSTRO PASTO PREFERITO (Our Favourite Meal)

 
I'm noticing I have LOTS of photos of Nancy on lounge chairs!
We were sitting on lounge chairs, moving them from spot to spot in our attempts to stay in the warmth of the sun while simultaneously keeping its dazzling glare out of our eyes.  As we sipped coffee and munched on pastries it struck us, this same time last year, we were hiking along the Franciscan trail in Central Italy.  Maybe it was the pastry, a morning tradition I have perpetuated since our return, that brought the memory forward.  Along with the fact we were relaxed and savoring every bite.  Not engaged in that rush, rush, rush, a typical American approach meals.  There was no “breakfast on the run” for Nancy and me that Saturday.
No better way to start the day.  Along with a caffe latte, of course.
      We sat back recalling a few of the highlights; the green, rolling hills of the scenery that surrounded us each day.  The warm and friendly people of the country, the day we hiked without uttering a word out of respect for the spirituality of our location, the immense churches, the classic art and of course, the food of Italy.   
     Nancy and I had arrived in Rome after taking a red-eye from Vegas then hung out in the Newark airport for over twelve hours.  The following morning, after a restful sleep in a Marriott hotel, we met up with the other members of our group on the Spanish Steps.  Bogged with luggage, backpacks, hiking poles and the heaviest of hiking boots, Nancy and I were the last ones.  Late, not a good first impression. 

Someone was having too much fun shopping for her hiking gear. 
     After profusely apologizing we all clamored onto the travel bus, one far too large for the small narrow, twisting streets of Rome.  We were excited.  This trip was one focused on nature, spirit, art, history and food with, for Nancy and I, the added fold of promoting awareness for Alzheimer’s disease.  Knowing we were about to engage in three weeks of five to twelve mile hikes, daily, with elevations exceeding 1,500 feet (Mount Cucco) we figured worrying about calories, was soon to be a distant memory. 
     As Nancy and I reminisced about our trip, she asked me, which of the many meals we enjoyed, I considered the most memorable.   Without hesitation to Nancy’s question I brought up our very first meal in Italy.  The ravioli and spaghetti we enthusiastically ordered, looking forward to dining al fresco outside the Vatican. That, we agreed was our absolute worst meal!  We even sent the wine back!
Well, we were hungry, and we were in Rome, so we ate it anyway.  
 The next day’s meal was far better.  “You mean that antipasti plate we ate at the end of our first day in Orvieto?” Nancy asked.  “Definitely an artistic presentation of melon, prosciutto, crackers and cheeses, among the best I’ve ever tasted, but that wasn’t it,” I replied. 

  The home cooked meal we were so graciously served in the ancient stone abode of a generous and talented family consisted of wild boar stew, fried eggplant, pickled vegetables and perfectly seasoned pork is right up there.  But Nancy concurred, good as it was, that was not our most favourite. 

     While in Gubbio we dedicated ourselves to finding the ultimate in Gelato.  So for lunch, over a three day period, that was all we ate.  In my opinion, the pistachio was the best ever!  But I’m not sure we can count Gelato as one of our best meals.  Bucovina is where we toured a small and quaint but truly incredible, egg museum and where Nancy witnessed me eating not just one, not two, but three slices of pizza!  Was she ever impressed.  Authentic Italian pizza is far different from the cheese-stuffed crust, sauce-soggy, heavy-duty pizza we are accustomed to here in the States.  In Italy; so simple and so good.
Just a small sample of the incredible Egg Art from all over the world. 

I was thrilled eating pizza w/knife & fork is how it's done.
      A day or two later, I was in Chef Heaven as we made our way through a typical Italian grocery store.  The produce was a parade of robust and colourful fruits and vegetables.  And the eggs, not refrigerated, but stored at room temperature, and displayed as an end-cap.  The meats in the deli section were trimmed and sliced by the most professional and experienced butchers on the planet!  Slicing meats so fast and with such precision, I swore they were Italian Ninjas.  And no preservatives in the breads!  I could’ve stayed in that market the entire day.  But we gathered our supplies for our week-long stay at a hostel and made our way back to the van after only two hours. 

This is how it's done in the typical Italian market.  
   The following day, we made our way further north, where we consumed a lunch prepared and served to us by one of the best looking Italian men my eyes have ever feasted on.  This combination chef, restaurant owner, hunter, fisherman and husband (sad face) offered his guests freshly caught fish resting on a bed of freshly harvested greens.  The sensuous risotto was topped with shavings of freshly, hand-picked black truffles!  And we weren’t charged by the gram rather they were heartily applied as though they are part of everyone’s mid-day meal!  The abundance of those unctuous fungi resting on our bowls of steaming creamy rice was brightened with just a hint of lemon zest.  This meal is a close second due to the expertise of the hands that prepared it for and my zeal regarding the truffle hunting expedition we went on with that big, strong Italian and his faithful dog.
The dog hard at work sniffing out Black Truffles

The man with his back to us is my Italian Hero.
     Then there’s the day of the Cheri Festival.  Where, after mingling among the thousands of Italian families that participate or observe amid cheers, shouts and church bells we finally hit a wall of fatigue.  Many in our group were tired.  Nancy and I among them opted to stay in for the evening at our bungalow along with a few of our new friends.  Opening a bottle of wine I’d purchased while at the Festival we prepared our own meal of leftovers along with a few items purchased at the local market the day before.   Nancy stated she really enjoyed this make-shift feast, but wasn’t sure we could declare it our very best food experience in Italy.
Add caption
      During those three weeks we hiked, ate and drank, I’d say pretty much every meal exceeded my expectations and was sublime, except that first one in Rome.  But it was the afternoon we toured the small family run olive oil production facility where Nancy and I agree, we indulged in the very best meal of all.  That day, our morning was spent taking a small boat out to some huge national park and wild life refuge.  It was quite warm and a bit humid following several days of rain.  The hike, though flatter and more level than most we’d experienced during our travels, was dusty and lengthy.  After the boat ride back to shore, we continued our hike up streets much like those in San Francisco with just as many twists and turns.  Finally we staggered up a few more stone steps until we reached the olive oil distillery.  Here we learned the art of pressing and extracting olive oil.  We watched as the huge millstones pressed the olives into paste.  Then the paste was spread onto over-sized discs that are sprayed with water as they extract the oil.  There is so much more to the process but the video I took of the gentlemen who gave us the tour is completely in Italian.  Our translator was there, but you can barely hear her over the presses.
What did you say?  I can't hear you!
     After the tour of the machinery was complete we were guided back downstairs where the other family members had set up a veritable feast!  Lots of wine, of course, and an array of meats, cheeses and fruits that boggled the American mind.  Homemade breads sliced and set out for us to either prepare our own sandwiches or simply slather with what looked to me like home-churned butter.

Loved the San Diego shirt on the Italian.
      The star attraction of this meal was the Cannellini bean soup.  Simple and straight-forward in true Italian tradition.   Nothing on that long, wooden farm table was over-done or over-dressed.    You could actually taste the love this family put into everything they do, be it olive oil making, gardening or cooking.  I was not alone in my return trips to the table for seconds.  The soup consisted of creamy white beans with a few kidney beans stirred in.  Rosemary, with salt and pepper, cooked low and slow, created a depth of flavors I dare say have yet to be duplicated in any other bean soup I’ve tasted before or since.  For the finish, the soup was lightly drizzled with the olive oil produced upstairs. 
    Nancy, the others and I, gathered our paper plates and (real) glasses of wine (I love how they would never serve wine in plastic) and sought out make-shift seats on the stone steps we had moments before climbed.  No longer feeling hot, sweaty and weary, we were now energized by the sights and smells of our meal.  Every one of us was abuzz with hunger and by now well practiced in the Italian way of savoring our meals.  We ate and drank then ate and drank some more.  Two and a half hours later, we thanked our hosts, purchased a few bottles of their home-made olive oil and made our way back to the shuttle bus. 
   The balanced seasoning, the complementary flavors, salty, zesty and warm, this was by far, Nancy’s and my best meal in Italy!  

This simple dish was our absolute favourite!

CANNELLINI BEANS
(Also known as Navy Bean, White Kidney, Great Northern or Tuscan Beans)

With so few ingredients, those ones used must be of the very best quality.  So the best of dried or canned beans?  For dried; Rancho Gordo’s Classic Cassoulet Beans rank the highest.  Their dried beans leave many scratching their heads as to why these are so sub-par while their canned are among the most rich and flavorful.  For canned I recommend Goya Cannellini Beans.  Bush’s are close second, they also offering a rich, creamy yet firm bean.
If using dried beans be sure to pick through and toss out stones then soak overnight.  Canned, should be drained and rinsed. 

INGREDIENTS                                                                                                                   Serves 8-10
1 ½ Tblsp olive oil                                                               1 cup diced Spanish onion
1/8 tsp red pepper flakes                                                 6 cloves garlic – minced
1 bay leaf  (Turkish)                                                           ½ cup fresh sage, chopped                                                  
 4 cups chicken broth ( low sodium) + 3 cups water
2  16-oz. cans Cannellini beans(drained & rinsed) or 2 ½ cups dried beans (soaked)           
 1 can 8-oz. kidney beans (drained & rinsed) or 1 cup dried (soaked)
2 tsp white wine                                                                 salt/pepper to taste

PROCESS
Heat oil in large heavy pot or Dutch oven, over medium heat. 
Add chopped onion and cook until translucent and soft, about 3-5 minutes.
Still in red pepper flakes, garlic and bay leaf.
Stir in beans and broth, cook about 30 minutes. 
Add wine, ¼ cup of the chopped sage, continue cooking on simmer another 2-2 ½ hours or until beans are soft, but not mushy.
Remove from heat when ready. Season to taste with salt and pepper, uncovered. 
To serve; ladle cooked beans into individual bowls and garnish with remaining sage and a drizzle of oil.

Tuesday, May 2, 2017

A Little Bit Of Lemon

     The lemons are coming, the lemons are coming!  That is the citrus-cultivators cry soon.  For those lucky enough to have harvests so excessive they may sound as though they’re complaining.   I envy them. And of course, always offer to take a bag or two off their hands for them. 
     I have in my back yard a lemon tree that provided me with this fresh, juicy fruit for the first two years of its life in an over-sized pot. 
But now nothing.  Actually for the past few years, nothing, in spite of my fertilizing, kind words and joyful singing.  While those lovely, fragrant blossoms do appear, they eventually fall to the ground and I am left with a tree of green, healthy leaves without a single lemon to cook down into a rich curd or to whip into a refreshing gelato.  Not even a single lemon with which I can zest or squeeze onto a bowl of garden vegetables with a drizzling of unsalted butter.  So I went out and purchased a new lemon tree.  Here I sit, fingers crossed and hopeful those pretty white flowers will soon transform themselves into bright yellow, ovals ready for culinary adventures.


     Though lemons originated in Southeast Asia, they are currently cultivated in temperate climates all over the world.  California is the largest producer of lemons in the U.S.  It’s true, we can purchase lemons year round, they are best during their natural season which runs from May to October.  History shows lemons have been used for all sorts of medicinal purposes.  Lemon juice serves as my favourite sore throat cure.  Freshly squeezed juice in a cup of hot water, sweetened with a teaspoon of honey and a good tablespoon of brandy.  “Ahhh” says my throat. Lemons were once considered a remedy for epilepsy. 
     And who hasn’t used lemon juice as “invisible ink” for writing secret messages to members of a tree-house or other exclusive club?  Lemons can serve as bleaching agents.  I know some people who add a bit of lemon juice to a tablespoon of baking soda and brush their teeth with this mixture.  Though, according to some commercials, lemon juice negatively impacts the enamel on our teeth.  Lemons and their close relatives have been used as an ingredient in magic and occult.  It is said, witches used lemon verbena, a citrusy herb, put it in a bag then placed the bag under the pillow of those who suffered from insomnia or poor sleep patterns. 
Lemon’s closest cousin, lemon grass, is an important flavor component in Thai and Vietnamese cuisines.  Easily recognizable in your produce section with its leggy, green-gray hued leaves and citrusy aromatics.  I’ve used those long, woody stalks as Popsicle sticks for some of my over-twenty-one popsicles.  Not only do they add visual interest to this otherwise common homemade summer treat, the lemon grass stalks infuse a pleasant high note to my “adult swim” frozen refreshers.


     But I digress from my focus on lemons.  If you are lucky enough to procure a prolific harvest or know someone who is generous enough to share with you I’d like to provide a simple recipe for making lemon curd.  This sun-bright, smooth, tangy concoction is expensive to purchase, so in my mind it doesn’t make “cents” to buy when you can make it yourself. 
     Use lemon curd on your waffles, in my June 2014 Blog story, I shared with you my recipe for Lemon Waffles.  In the photo you can see there is a delightful dollop of homemade lemon curd nestled next to a heaping spoonful of blueberry compote.  Lemon curd on toast or along-side your freshly baked, warm scones.  Lemon curd beautifully highlights crisp rounds of sweet meringue in my version of Pavlova.  Petite individual servings for each guest sitting around your table to enjoy and savor. 

Recipe for Lemon Curd by Deborah L Costella

Ingredients
1/3 cup freshly squeezed lemon juice (3-4 lemons)                          6 egg yolks

·         Save whites for an egg-white omelet or a frothy cocktail like a Pisco Sour, Clover Club Cocktail or a Lemon Lavender Gin Fizz * Think I’ll give you the recipe for that on my web site:www.cosmicmuffincafe.com since more lemons are involved!

1 cup super fine sugar (Bakers or Caster)                   zest of 4 lemons * Hint: zest first then squeeze out fresh juice
8 tablespoons unsalted butter – cut into cubes and held at room temperature


Process

Set a stainless bowl over a pot of simmering water, making sure the bottom of the bowl does not touch the water.

In the bowl, whisk egg yolks for about 1-2 minutes.   Slowly whisk in sugar, so as not to “burn” the yolks, then add lemon juice and zest.  Continue whisking until yolks thicken and form ribbons.  This will take 7-15 minutes.  Be sure to check the water level so that it hasn’t simmered off.  Add more water if needed.

Once yolk mixture has thickened, begin adding the cubes of butter one at a time, waiting until each cube has completely integrated before adding the next.

When all butter has been incorporated strain curd through a sieve or strainer into a clean bowl.  Cover with plastic wrap, making sure the wrap touches the curd, just as you do when you prepare homemade guacamole.  Store in fridge for at least 2 hours then use as desired.

To be honest, I like my curd served warm over vanilla scones on top of toasted English muffins in the morning.  So good.

The curd can be stored, covered, in the fridge for up to 1 week.


Recipe for Individual Pavlovas by Deborah L Costella

Ingredients

1 ½ cups super fine sugar (Bakers or Caster)           2 teaspoons cornstarch - sifted
6 eggs whites (room temp)                                       pinch Kosher salt
1 teaspoon vanilla bean paste                                   1 1/2 teaspoons fresh lemon juice
Parchment paper                                                       1 pint of berries (your choice)                                               

Process                                                                              
                                                                                  Preheat oven to 300 degrees

Set sheets of parchment paper on 1 or 2 sheet pans (depends on the size you have at home)
Using a pencil, draw 3” circles, then flip parchment to other side so you can still see your template but no pencil will infuse into your meringues.  Set aside.


In a small mixing bowl combine sugar and cornstarch.  Set aside until ready to use.

In stand mixer or using a hand-held mixer in a large bowl, beat egg whites and salt together on high until soft peaks form.  Maintaining speed, add sugar/cornstarch mixture to egg whites, one tablespoon at a time, allowing about 1 minutes between additions.  Continue beating until stiff peaks form.


Turn off mixer, then gently fold in vanilla paste and lemon juice, being careful to not deflate whites.


Using a small spatula, spoon meringue onto parchment paper using penciled templates as your guide.  They don’t have to be perfect circles.  I like mine rather rough and rustic.  Use the back of a spoon to gently create a small indentation on each round of egg white.  This will provide you with a little concave spot to fill with your lemon curd and fresh berries.


Place baking sheets in oven and bake for 45 minutes, or until peaks are a soft golden brown.  Turn off oven, crack oven door open slightly, all allow meringues to cool for 1 hour.


Meringues will be crispy on the outside and soft and chewy on the inside.  They are now ready to be spread with your homemade lemon curd and topped with the fresh berries. 


                                                                                                 Serves 10 - 12 

Sunday, April 2, 2017

Every Chef Has A Little Secret

Ever wonder what Chefs eat, when they're not hurriedly gobbling bites while standing over the trash can before rushing back to work the line? You might be surprised to find out many talented and experienced cooks indulge in dishes far less spectacular than what they send out to your restaurant table.  Equally interesting is while they often make efforts to dine at the industry's "hottest" spots or frequent restaurants run by close friends, many quietly eat at some of the most inane restaurant chains you can imagine.

An example is that of one of the most creative and focused chefs I've ever had the pleasure to work with.  After years spent cooking in a variety of restaurants in Las Vegas, starting at the tender age of sixteen in a Mexican restaurant, he moved on to establish the menu and set the bar for a high-end restaurant in Northern California. These days you'll find him wowing customers in the Pacific Northwest assembling fusion cuisine based upon his Caribbean heritage. But on the rare occasions he's in the mood for someone else’s cooking, he takes the wife and kids to . . . Olive Garden! Apparently he's a sucker for that salad and those bread sticks. 
Believe it, it's true. 
Another seasoned chef I know finds refuge after his ten hour shifts amid flying pots, pans and raging Salsa music in a bowl of Kraft Macaroni 'n Cheese. 
And so is this. He loves this stuff!
 Then there’s the rather famous set of twin sisters, both meticulous pastry chefs who can each spend an hour decorating one cookie.  They work side by side for a Hollywood catering company.  After their long shift they trek home in unison and together, throw some Kimchee over days old white rice, heat it up then top the concoction off with a poached egg. Then, in unison, they curl up on the couch and together watch National Geographic channel.  This is a daily occurrence during Shark Week. 
You can purchase commercial Kimchee or make your own.

And believe it or not, one of my visiting chef friends never misses his 2:00 a.m. runs to Roberto’s for a Carne Asada Burrito whenever he’s in Vegas.  This same chef, and mind you, he trained under Wolfgang then later went on to win a James Beard Award, can be counted on to have one of those $5.00 foot-long sandwiches from Subway sitting in his fridge at home as well as a box of Pizza Bites in his freezer.

Even I have a long time food secret. But there is a story behind it.  Up until about the 1970’s, the sleepy town of Sunnyvale California was as heavily populated with fruit orchards as it was residents.  Rows and rows of cherry and apricot trees filled what now houses Tech facilities, condos and mixed-use shopping centers.  I can remember sitting in the backseat as my parents drove under the bridge that carried can after can of fruit from one end of the Libby canning and shipping facility to the other.  The scent of so much fruit being cooked and boiled was overpowering, wafting its way through the surrounding neighborhoods.

One year, my father, a great lover of apricots, had decided to begin his own little cannery of sorts in our  backyard.  He left the house early one Saturday morning and returned with so many bushels of apricots the nursery rhyme “I love you a bushel and peck, around the neck” immediately made literal sense to me. 
My little brother, sister and I continued playing Hide & Go Seek, running around the front and back of the house in anticipation of something special, but what it was, we didn’t know.  Shortly after dad lugged in the last bushel of apricots, my Nana, Papa, Uncle and his latest girlfriend (“the flavor of the month” as dad referred to them) arrived.  I had never seen my grandmother wear jeans before, so that in itself made for a special day in my mind.
Delicious on their own.  Fresh Apricots. 

Dad gathered us all together outback in a huddle instructing each on what and how to perform our part of this familial assembly line.  We kids were in charge of washing the “cots” under the running water of the hose to remove debris, while pulling off stems and leaves.  I have no idea,  where he found them or whether perhaps he made them, but there several wooden racks covering the patio, making the area look more like a mathematical grid than a place where we usually held barbeques.  We spent the entire day, cleaning, cutting, and pitting the cots then placing them between the slats of the racks.  The fruit was to sit for several days until they were shriveled and dried to perfection. 
Concentrated sugar when dried.  
Dad obviously drew on a years old activity for us that day. 
But at the end of our long and arduous day each one of us was covered in dirt, grime and sweat.  When one of the grownups asked “What are we going to do about dinner?”  Announcing out loud what, I’m sure, each of them felt, “Well, I’m certainly not cooking tonight.”  Someone answered, “Let’s go pick up some chicken.” 
This is the "bucket" I remember. 

Uncle Frank and “Flavor” returned with buckets of Kentucky Fried Chicken, Mashed Potatoes and Gravy, Corn on the Cob and those Biscuits.  It was the most delicious dinner I had ever had. The crunch of the crispy skin and the moist meat inside made my mouth dance.  The soft biscuits which I dunked into the heavily salted and peppered gravy, brought such pleasure to a seven year old, it stays with me to this day.  So, now when I’m in need of comfort food or missing my family and childhood, you’ll find me making my own run to KFC.  I try to be discreet by making use of the drive-thru then scuttle home quietly enjoy my bliss. 


  Dad repeated this apricot drying ritual for several seasons.  He made apricot jam.  Apricot pies.  Apricot turnovers.  And insisted we snack on apricots when we kids complained of hunger between meals.  The scent of cooking apricots stayed with me for years.  It has only been in recently I’ve been able to enjoy apricots again.  But I do miss my grandparents, my uncle and siblings, especially dad and his apricot-everything. 

My Recipe for Fried Chicken/An Adaptation of KFC
Make sure you use a cast iron skillet, it can take the heat and makes a difference in taste and texture. 

  You can use grapeseed or peanut oil (higher smoking point), but not olive oil (lower smoking point)


Ingredients:  

1 whole 3 lb. chicken - cut (there are tons of videos to help you)           1 1/2 cups buttermilk
salt and pepper          1 tblsp Frank's hot sauce   1 tblsp plain 'ole mustard    2 cups all purpose flour
1 tsp each: dried oregano, chili powder, sage, dried basil, dried marjoram, and onion powder
1 tblsp paprika       2 cloves fresh garlic - minced   lard or crisco and about 2 tblsp bacon fat (if you have it)

Process:
Place cut up chicken sections into a large bowl and season with salt and pepper. Pour in buttermilk, mustard and Frank's hot sauce, mixing to coat chicken completely.  Cover with wrap and allow to sit in fridge for 1-3 hours.
A thick, rich soak for some worthy chicken.  

Remove chicken from fridge about 30 minutes before frying.  Meanwhile place flour in a large pan or dish and season with additional salt, pepper and all other dried seasonings.  Use a fork to mix seasonings into flour.  


Once out of the fridge, allow chicken to come to room temp then dredge each piece in the seasoned flour.

Note:  Allowing the chicken to come to room temperature is important to get a good fry.  Many people make the mistake of taking a cold bird from the fridge then place in the hot pan or on the grill expecting to get a good sear.  Not going to happen. 

 Heat lard or Crisco and bacon fat over medium heat, until melted and shimmering in a cast iron skillet.  You'll need  enough oil/fat to immerse but not completely cover the chicken.  Check the temperature of the fat to ensure it has reached about 360-365 degrees. Temp will drop once you add chicken.  I cook over medium heat to avoid burning the outside while under-cooking the inside and cover the skillet with my splatter screen to avoid mess.  

I don't suggest you cover the skillet with a lid.  You could end up steaming, instead of frying. 


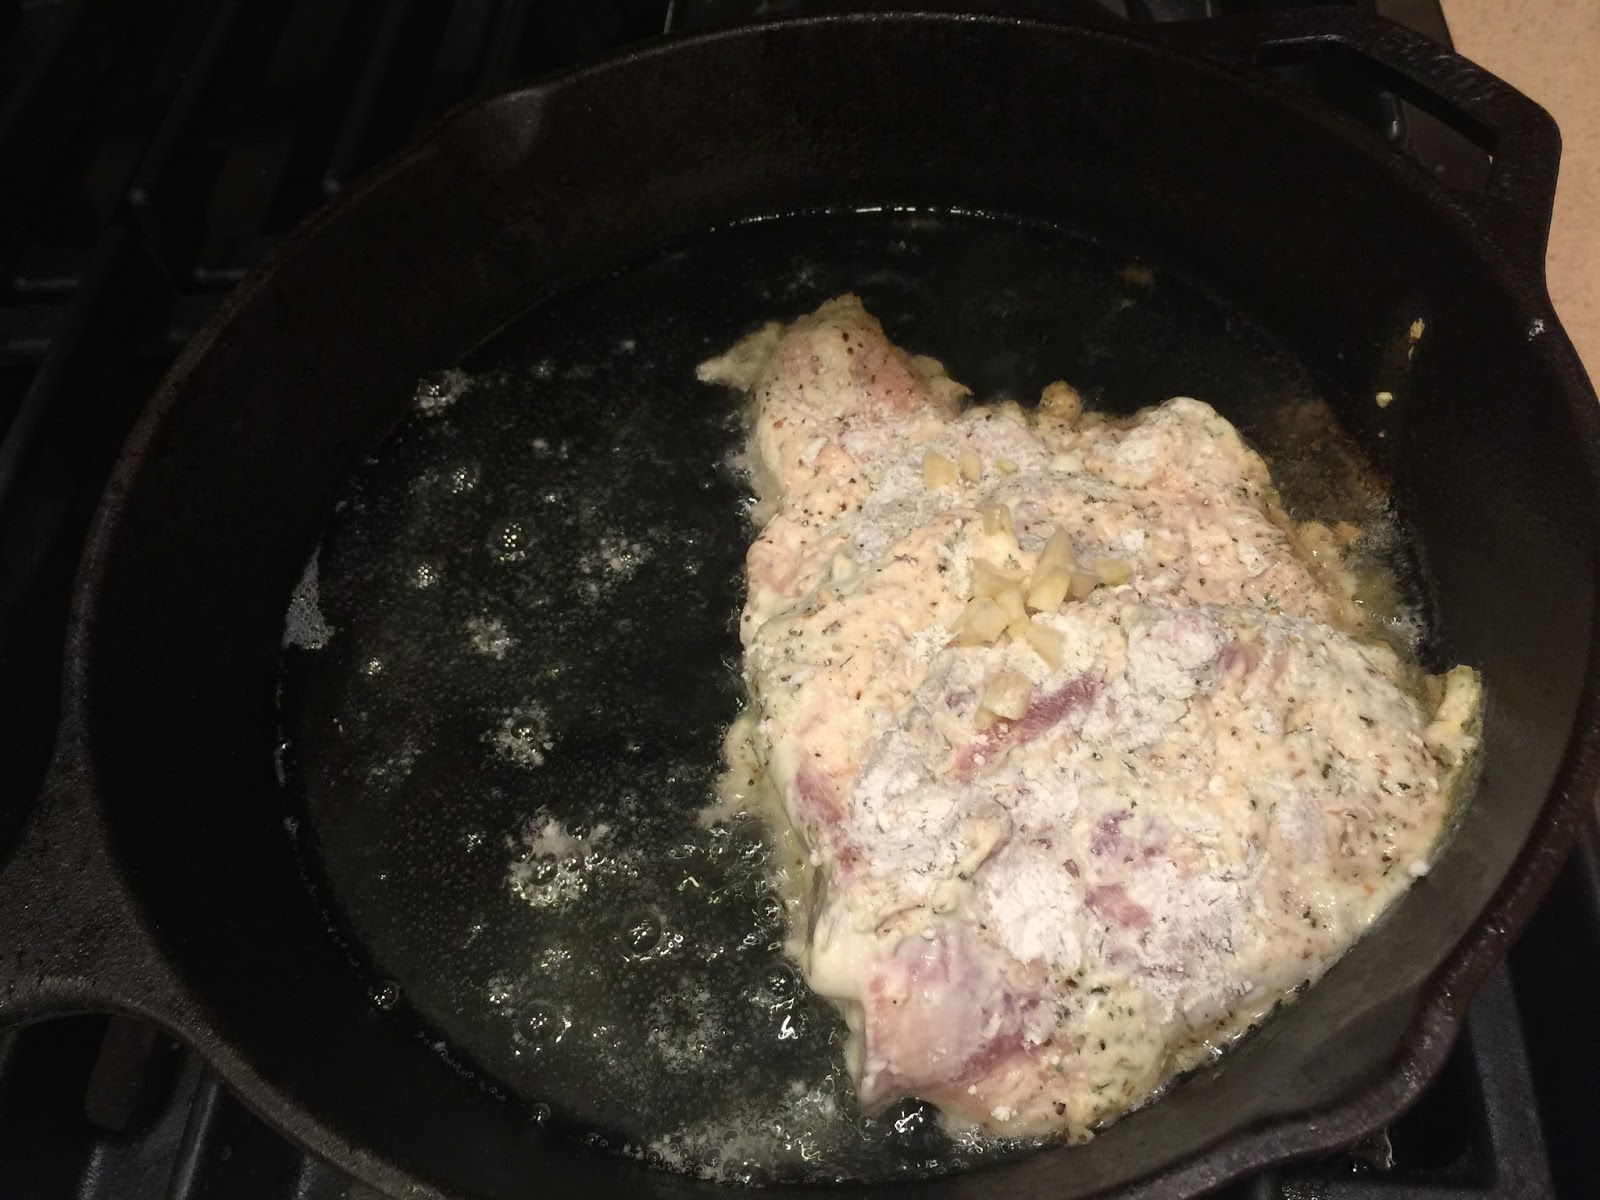
Once fat is hot enough, using tongs, carefully place a few pieces of chicken into skillet and sprinkle with bits of minced garlic.  You may need to fry your chicken in two batches to avoid crowding the skillet.  Crowding equals steaming and reducing your chances to attain that nice crispy crunchy skin.  Fry until browned on both sides. 

Remove cooked chicken pieces and place on a cooling rack NOT on a paper towel-lined plate.  Paper towel-lined plate equals soggy chicken skin.  Allow to cool about 5 minutes then sit and enjoy.  Even the better the next cold.  
So good, that yes, I do indeed lick my fingers!